
How to Verify Your Domain for Google Workspace: Step-by-Step Guide
By Divya – Support Engineer and Google Cloud Certified Digital Leader with 2+ years of experience in Google Workspace administration at XL Technologies. Her expertise includes user account creation, permission management, email configuration, security, and ticket handling. With proven skills, she ensures smooth, secure, and efficient Workspace operations for clients. At XL Technologies, Divya plays a key role in driving digital transformation through Google Cloud solutions. She is passionate about helping businesses maximize productivity and collaboration with Google Workspace.
- What Is Domain Verification in Google Workspace?
- Why Do You Need to Verify Your Domain?
- What Do You Need Before Verifying Your Domain?
- How to Verify Your Domain for Google Workspace Using a TXT Record
- How to Check Whether Your Google Workspace Domain Is Verified
- Common Google Workspace Domain Verification Problems and How to Fix Them
- How Long Does Google Workspace Domain Verification Take?
- Can You Verify Your Google Workspace Domain Without a TXT Record?
- Does Domain Verification Affect Your Existing Website or Business Emails?
- What Should You Do After Verifying Your Domain?
- Google Workspace Domain Verification Checklist
- Conclusion
Setting up Google Workspace for your business involves more than creating employee email accounts. Before you can fully configure business email and other organisation-level services, Google needs to confirm that you own or control the domain you want to use.
For example, if your company owns yourcompany.com and wants to create professional email addresses such as [email protected], [email protected], and [email protected], you may need to verify the domain through your DNS settings.
However, many businesses face difficulties during this process. They may not know where to find their DNS settings, how to add Google’s verification record, or why Google continues to display a domain verification error.
In this guide, we explain how Google Workspace domain verification works, how to verify your domain using a TXT record, what to do if verification fails, and how to prepare your domain for business email activation.
What Is Domain Verification in Google Workspace?
Domain verification is the process of proving to Google that you own or control the domain associated with your Google Workspace account.
Google uses a unique verification code to confirm that you have access to your domain’s DNS settings or another supported verification method.
For example, suppose your business owns:
yourcompany.com
You want to use Google Workspace to create:
Before Google can provide the relevant organisation-level administration features, it needs to establish that you control yourcompany.com.
This verification process helps prevent someone else from using your business domain to create an unauthorised Google Workspace organisation.
Why Do You Need to Verify Your Domain?
Domain verification is an important step in setting up and managing Google Workspace.
Once your domain is verified, you can gain access to organisation-level management capabilities, subject to your subscription and administrator permissions.
These include:
- Creating and managing employee accounts.
- Managing user profiles and account settings.
- Configuring administrator permissions.
- Managing business email services.
- Controlling access to Google Workspace applications.
- Managing organisational security settings.
Without completing the required verification, some administration and setup features may remain restricted.
Important: Domain verification and email activation are two different steps. Verifying your domain proves ownership, but it does not automatically route incoming emails to Gmail. You must configure the appropriate MX records separately when you are ready to activate Gmail.
What Do You Need Before Verifying Your Domain?
Before starting the process, make sure you have access to the necessary accounts and domain settings.
1. Access to Your Google Workspace Administrator Account
You need to sign in using the Google Workspace administrator account associated with your organisation.
The account must have the required Domain settings administrator privilege to manage domain verification.
2. Access to Your Domain Registrar or DNS Provider
You need access to the platform where your domain’s DNS records are managed.
Popular domain registrars and DNS providers include:
- GoDaddy
- Namecheap
- Cloudflare
- Hostinger
- Bluehost
- AWS Route 53
- Squarespace
Remember that your domain registrar and DNS hosting provider may be different companies. You must add the verification record wherever your domain’s authoritative DNS is managed.
3. Your Domain Name
Keep your business domain name ready.
For example:
yourcompany.com
You generally enter the domain without https://, http://, or www.
4. Access to DNS Records
Make sure you can view and edit DNS records, especially TXT records.
If you do not have permission to change DNS settings, contact the person or company managing your domain.
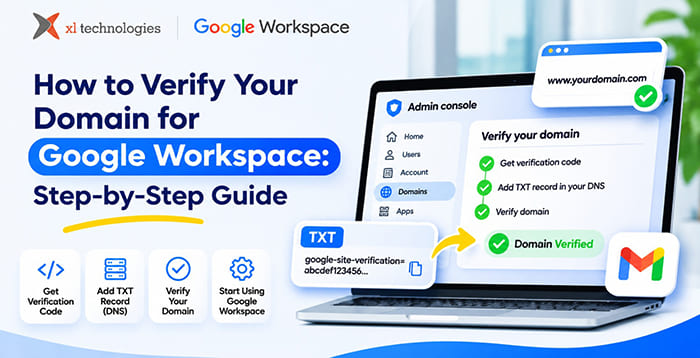
How to Verify Your Domain for Google Workspace Using a TXT Record
Google’s standard domain verification process uses a unique TXT record.
Follow these steps to complete the verification.
Step 1: Sign In to Google Admin Console
Open the Google Admin Console:
Sign in using your Google Workspace administrator account.
Make sure you are using the correct account associated with the domain you want to verify.
Step 2: Open Manage Domains
After signing in:
- Open the Admin Console.
- Navigate to Account.
- Select Domains.
- Open Manage domains.
- Find the domain you want to verify.
- Select Verify domain.
You may also be able to complete the process through the Google Workspace setup tool if you have recently created your account.
Step 3: Generate Your Google Verification Code
Google will guide you through the domain verification process.
- Select Get started.
- Choose your domain registrar or DNS provider.
- If your provider is not listed, select the option indicating that your domain uses a different host.
- Locate the TXT record section.
- Copy the unique verification value.
The verification value generally looks similar to this:
google-site-verification=abcdef123456789xyz
Important: This is an illustrative example, not a real verification code. Always copy the exact value generated for your own Google Workspace account.
Do not use another website’s verification code or manually create a random value.
Step 4: Log In to Your Domain DNS Management Panel
Open the website where your domain’s DNS records are managed.
For example, if your domain’s DNS is managed through Cloudflare:
- Sign in to Cloudflare.
- Select your domain.
- Open DNS.
- Select Records.
- Review the existing DNS configuration.
The interface may differ depending on your provider, but you need to find the section where TXT records can be added.
Step 5: Add a New TXT Record
Create a new TXT record using the unique verification value provided by Google.
Use the following configuration as a general guide:
| DNS field | Value |
| Type | TXT |
| Name / Host | @ or blank, depending on provider |
| Content / Value | Your unique Google verification code |
| TTL | Default or provider-recommended value |
For example:
Type: TXT
Host: @
Value: google-site-verification=your-unique-code
The value above is only an example. Use the actual code from your Google Admin Console.
If you are verifying a subdomain, enter the subdomain value in the host field as instructed by Google.
Step 6: Save the DNS Record
After entering the verification details:
- Double-check the TXT record type.
- Confirm the host or name field.
- Make sure the entire Google verification value is included.
- Save the DNS record.
- Confirm that the new record appears in your DNS management panel.
Avoid modifying existing MX, A, CNAME, or other DNS records unnecessarily. Adding a domain verification TXT record should not require changing your website hosting or existing email routing.
Step 7: Return to Google Admin Console and Verify
After adding the TXT record:
- Return to your Google Workspace setup window.
- Select the confirmation option indicating that you have added the record.
- Click Confirm or Verify, as displayed.
- Wait while Google checks the DNS record.
- Review the verification result.
If Google detects the correct TXT record, your domain ownership will be verified.
You can then continue with the remaining Google Workspace setup steps.
How to Check Whether Your Google Workspace Domain Is Verified
After completing the process, you should confirm that Google has recognised your domain.
Follow these steps:
- Sign in to Google Admin Console.
- Navigate to Account.
- Select Domains.
- Open Manage domains.
- Locate your primary or secondary domain.
- Review its verification status.
The status column indicates whether the domain has been verified.
If your primary domain still requires verification, the Admin Console may also display a setup notification.
Common Google Workspace Domain Verification Problems and How to Fix Them
Sometimes Google cannot verify a domain even after you have added the TXT record.
Below are common problems businesses may encounter.
1. Google Cannot Find Your TXT Record
This is one of the most common verification issues.
You add the TXT record to your DNS panel, return to Google Admin Console, and receive a message saying that the domain could not be verified.
Possible reasons:
- The TXT record was not saved.
- The record was added to the wrong domain.
- DNS changes have not propagated.
- The verification value was entered incorrectly.
- You updated DNS settings at a provider that does not manage the authoritative nameservers.
How to fix it:
- Open your DNS management panel.
- Confirm that the TXT record exists.
- Check that the value matches Google’s verification code.
- Confirm that you updated the correct domain.
- Check the publicly published TXT records.
- Wait for DNS propagation before trying again.
How Long Does Google Workspace Domain Verification Take?
Domain verification is usually straightforward, but the time required depends on your DNS provider and how quickly its changes become publicly available.
Google explains that TXT record changes may take up to 72 hours to be recognised. In many cases, verification happens much sooner.
Consider these points:
- Your DNS provider must publish the new TXT record.
- The verification value must be entered correctly.
- DNS caching may delay recognition.
- Google must be able to find the record associated with your domain.
If verification fails immediately after adding the record, avoid repeatedly changing the configuration. First confirm that the record has been saved correctly and allow time for DNS updates to become visible.
2. Incorrect TXT Record Host or Name
Some businesses purchase their domains through one company but manage DNS through another.
For example:
- Domain purchased through GoDaddy.
- Nameservers managed by Cloudflare.
- Website hosted through a separate hosting provider.
If you add Google’s TXT record to GoDaddy while Cloudflare manages the authoritative DNS, Google may not find the record.
How to fix it:
Identify which nameservers are active for your domain.
Then sign in to the platform responsible for managing those DNS records and add the verification TXT record there.
4. The TXT Record Contains an Incorrect Value
Google generates a unique verification code for each verification process.
Even a small typing error can prevent verification.
Common mistakes include:
- Missing characters.
- Copying only part of the verification value.
- Adding unwanted spaces.
- Removing the google-site-verification=
- Using an old verification code.
How to fix it:
Return to the Google Workspace setup tool, copy the complete current verification value, and compare it with the published DNS record.
5. Your Domain Is Already in Use with Another Google Workspace Account
Another problem occurs when Google reports that the domain is already associated with an existing Google Workspace account.
This can happen if:
- Your organisation previously used Google Workspace.
- A former employee created an account using the company domain.
- A previous service provider configured Google Workspace.
- Your domain is associated with an existing organisation.
How to fix it:
Do not create repeated new accounts or remove DNS records randomly.
First identify whether your organisation already has an existing Google Workspace account. If you have administrator access, review the domain configuration. If you do not, use Google’s official recovery or support process to establish ownership and resolve the existing association.
6. You Do Not Have Permission to Manage DNS Records
Some businesses do not directly manage their domain settings.
Their website developer, hosting provider, or IT administrator may control DNS access.
Without the required permissions, you cannot add the TXT record yourself.
How to fix it:
Contact the person or provider responsible for your domain and share the exact TXT record generated by Google.
Ask them to add the record without changing your existing email or website configuration.
Can You Verify Your Google Workspace Domain Without a TXT Record?
Google’s domain verification process may offer alternative methods depending on your account and setup.
For example, supported verification methods may include:
- Adding a DNS TXT record.
- Adding a verification CNAME record where offered.
- Uploading an HTML verification file to your website.
- Adding an HTML meta tag to your website.
However, the available methods depend on the verification flow presented by Google.
For most businesses, TXT verification is a straightforward option because it can be completed through DNS without modifying website files.
If you use an alternative method, follow the exact instructions shown in your Google Admin Console.
Does Domain Verification Affect Your Existing Website or Business Emails?
This is a common concern for businesses that already have an active website and professional email service.
The good news is that adding Google’s domain verification TXT record does not, by itself, redirect your website or change your email routing.
However, it is important to understand the difference between domain verification and email activation.
| Configuration | Purpose | Impact |
| TXT verification record | Proves domain ownership | Does not change email routing |
| MX record | Directs incoming emails | Can change where emails are delivered |
| SPF record | Authorises email-sending services | Supports email authentication |
| DKIM record | Adds an email authentication signature | Helps receiving servers verify messages |
| DMARC record | Defines handling of authentication failures | Supports domain protection |
If your business currently uses cPanel webmail or Microsoft 365, you can generally verify domain ownership without immediately changing your MX records.
This allows you to complete domain verification before planning the email migration.
Important: Do not change your MX records until your Google Workspace accounts are ready and you have planned the email migration and routing process.
What Should You Do After Verifying Your Domain?
Domain verification is only one part of the Google Workspace setup process.
Once Google confirms ownership, you can proceed with the remaining configuration steps.
1. Create Employee Email Accounts
Create the required employee accounts using your verified business domain.
For example:
2. Configure Gmail
If you want to use Gmail for your business domain, follow the Google Admin Console instructions to activate Gmail.
This generally includes configuring the required MX records at your DNS provider.
3. Configure Email Authentication
Set up SPF, DKIM, and DMARC according to your business email requirements.
These records help authenticate legitimate email traffic and protect your domain from certain types of email spoofing and abuse.
4. Configure Google Workspace Security
Review administrator permissions, two-step verification, user access, and other security settings.
Make sure employees receive only the access they need.
5. Test Your Business Email
After activating Gmail and completing the required DNS configuration:
- Send test emails internally.
- Send emails to external addresses.
- Receive emails from external providers.
- Test employee accounts.
- Check email delivery and authentication.
- Confirm that important business email addresses work correctly.
Google Workspace Domain Verification Checklist
Use this checklist to make sure you have completed the essential verification steps.
- Sign in to the correct Google Workspace administrator account.
- Confirm that you have domain settings administrator privileges.
- Identify your domain registrar and DNS hosting provider.
- Access your domain’s DNS management panel.
- Open Google Admin Console and generate the verification code.
- Copy the complete Google TXT verification value.
- Add the TXT record to the correct authoritative DNS provider.
- Confirm that the record has been saved.
- Allow time for DNS propagation.
- Return to Google Admin Console.
- Complete the domain verification process.
- Check the domain verification status.
- Continue with Gmail activation and other Workspace configuration steps.
Keep the verification TXT record in place until Google has successfully detected and verified it. Google’s instructions state that it can be safely removed after verification, although retaining it is also an option.
Conclusion
XL Technologies is an authorised Google Workspace partner helping businesses with subscription setup, domain verification, DNS configuration, and business email migration. Our team helps identify DNS issues, configure the required verification records, and prepare business domains for Google Workspace activation.
Whether you are setting up Google Workspace for the first time or moving from cPanel webmail or Microsoft 365, XL Technologies can guide you through the configuration process and help your team transition to professional business email.
Frequently Asked Questions
1. Why does Google Workspace ask me to verify my domain?
Google requires domain verification to confirm that you own or control the domain associated with your organisation. This helps prevent unauthorised users from registering your business domain with Google Workspace.
2. How do I get my Google Workspace verification code?
Sign in to Google Admin Console, open Account, select Domains, and navigate to Manage domains. Select Verify domain and follow the setup tool to obtain your unique TXT verification value.
3. Where should I add the Google Workspace TXT record?
Add the TXT record wherever your domain’s authoritative DNS is managed. This may be your domain registrar or a separate DNS hosting provider.
4. How long does Google Workspace domain verification take?
The time depends on your DNS provider and how quickly its records become available. Google says TXT changes can take up to 72 hours to be recognised, although verification often completes much sooner.
5. Will domain verification affect my existing business emails?
Adding the verification TXT record does not change your existing email routing. However, changing MX records later can redirect incoming emails, so plan that step carefully.
6. Can I verify my domain if my website is hosted with another company?
Yes. Your website hosting provider does not necessarily need to manage your DNS. You can add the TXT record through the provider responsible for your domain’s authoritative DNS.
7. What happens if my Google Workspace domain is already in use?
Your domain may already be associated with an existing Google Workspace organisation. Identify the existing account and use the appropriate administrator recovery or Google support process rather than creating multiple accounts.
8. Do I need to verify my domain if I purchase Google Workspace through a reseller?
Google states that if your account is managed by a reseller, your domain may already be verified, so no additional verification step is needed. Confirm the status with your reseller or in the Admin Console.